A prime example of one of those time consuming tasks without which the whole restoration would be rendered hopeless.
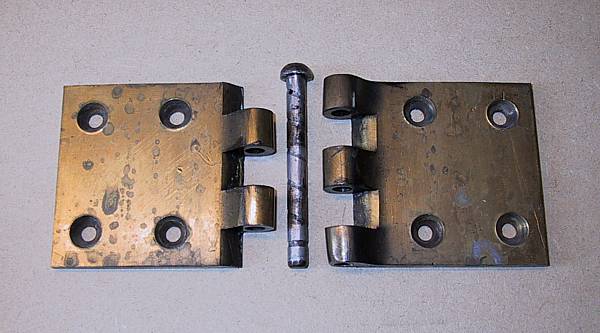
There are 3 hinges on each door, each having a different pin offset to allow for the door's curvature - obviously, all pins must be be perfectly aligned on final assembly to allow the door to open. It is important to re-fit the hinges in their original positions to avoid misalignment. This picture shows the offside rear middle hinge in pieces. Missing from the shot is the oil nipple that screws into the mushroom shaped cap at the top of the pin. Each pin is centre-bored to a depth of 3/4 inch and then cross-drilled to allow the oil to run down the oil scroll and lubricate the hoops.
All of the hinges had worn on both pin and hoop. Unfortunately, some helpful soul had attempted to rectify the sag by hammering the hoops to reduce the free play, which meant that the exteriors also required re-dressing to remove the evidence.
The maximum ovality was measured over all hinges. As wear will only occur on the load-bearing side it was necessary to double the wear factor before adding to the nominal hole diameter. Bore size went from 1/4 inch to standard size 'P' (8.2mm). New pins were ground from stainless steel bar; drilled, threaded and then ground for the oil scroll.
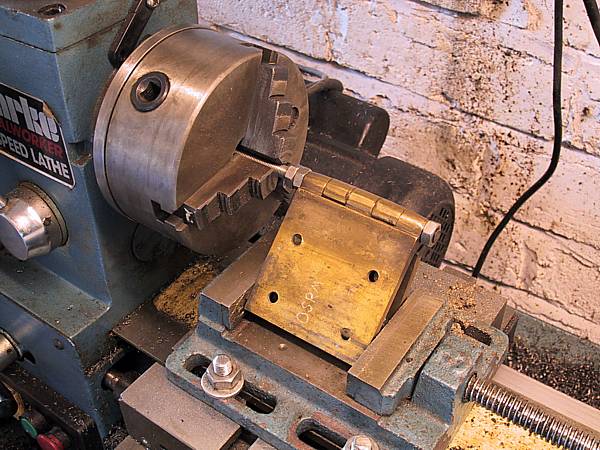
In order to centre the hinge in the lathe, the two halves were clamped using threaded rod and the latter was then located in the chuck. Exterior edges of the tapered barrel of the hinge are best aligned by feel to ensure that the wear ovality is brought back onto datum. A vice on the moving bed was then positioned to clamp the two hinge flaps without deflecting the whole from its centre-line. Proof of the alignment was the ability to withdraw the hinge from the rod without any scraping or deflection.
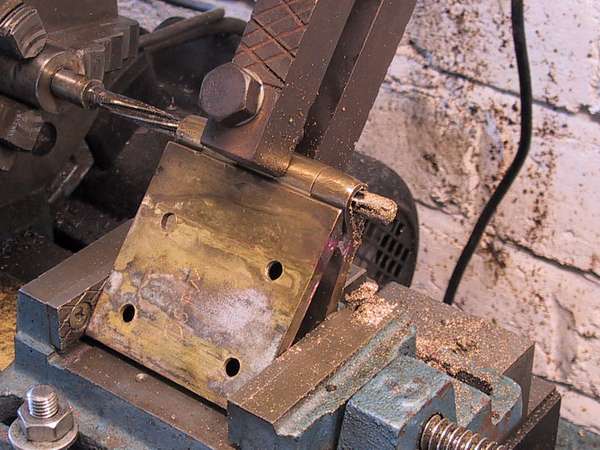
The hinge hoops were clamped in position relative to each other and the centre-line. The size 'P' reamer was mounted in a floating arbor in the chuck. The arbour allows the reamer to stay on the datum without any radial forces pushing it out of line. The first few turns of the chuck were made manually to ensure accurate location in the hinge bore before running through (with bated breath). A chuck speed of 1000rpm was use to remove any risk of jamming in the soft brass of the hinge body. As soon as the reamer had passed through the hinge the lathe was switched off and the reamer withdrawn.
All twelve hinges were successfully bored and re-assembled. The hinges were fairly stiff to operate by hand but proved to be very smooth once carrying the weight of the doors.
There was no evidence of chrome when the hinges were dismantled. To retain the original finish they were dismantled and sprayed before final assembly.