
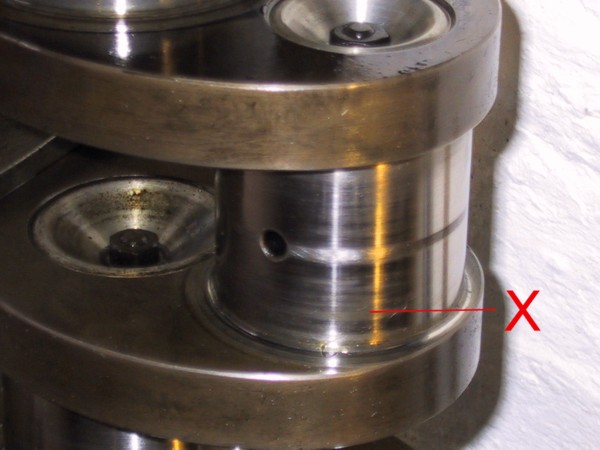
Re-assembled to ensure the correct positioning of parts. The forked con rod to the 'B' block is on the left and bolts onto the bearing block. The 'A'-side blade-rod can be seen mounted around the bearing block between the forks of 'B'. Scouring is visible on the big end shell. As the journals are in good condition this is probably due to running on contaminated oil.
Piston removal is not as straight forward as may first appear. The 4 big end bolts on the forked 'B' rod will snag on the liner or block unless the crank is moved to just off BDC. The 'B'-side bolts in the 'A' blade rod will not push through until the forked rod has been released from the bearing block and the crank rotated. Once the caps and their shells have been removed the con rods must be pushed up the bores, rotated through 90 degrees and then pushed up into the cut-outs in the base of the liners - this is because the big end of the rod is wider than the bore. In this position the piston is poking above the top of the block with just enough clearance for the gudgeon pin to be tapped out. Remove the piston then rotate the crank to allow the con rod to be extracted from the bottom of the engine. Re-assemble the components in their correct order to avoid catastrophe later on.
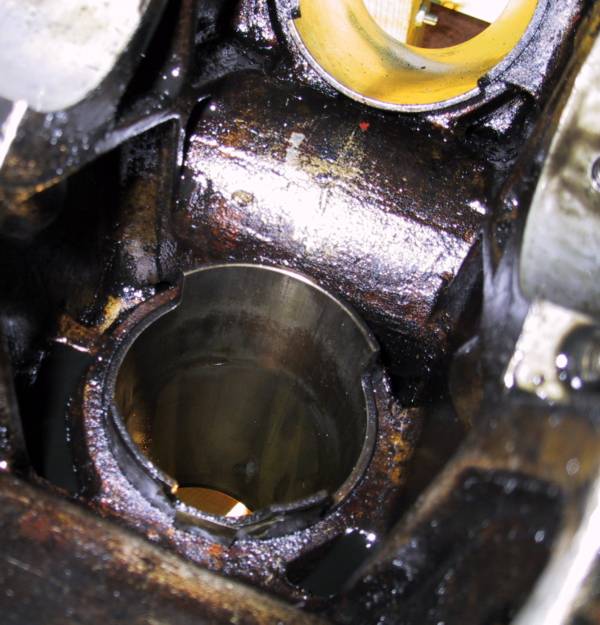
Liner A1 showing a chip out of the skirt. This was evidently missing at the last rebuild as there is a thin sheet metal 'repair' at the edge of the liner. The next picture shows where the interior of this liner is damaged.
The remaining eleven liners seem to be in excellent condition displaying no apparent wear, scouring or top-lip.
Only one piston was damaged - B2. This piston was very tight in the bore and took some effort to extract. The top and second rings had been trapped in their grooves for about half of the circumference with the second ring snapped. No marking evident in the bore. Further investigation required.
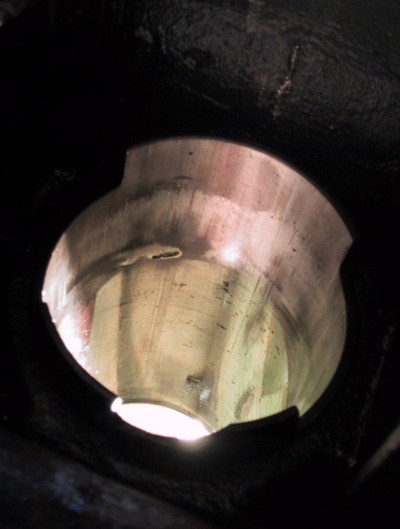
Interior shot of liner A1, looking up the bore, showing a piece missing from the wall at about ring level for BDC. There was no evidence of damage to the piston or rings.