Hours
Click for pictures
0.5
6.0
4.5
2
5
2
1
4
2
2
1.5
3
2
4.5

2.5
2.5
3
-
6.5
3.5
14th April
4
1
5
7
2
1.5
1
4
2
5
8
6
-
-
-
-
-
-
211.0
The diary is set out in tabular format with each day's work briefly described. If you place the cursor over the thumbnail pictures in the right hand column a message will appear stating how many pictures are available and at what size - eg "2 x images - 34&58kb". If you choose to click to the new page a narrative alongside the pictures will explain points of interest, particular problems or methods of rectification.
Click "<<< Back to the diary" to return to this page
Click "Next page " to advance without returning to the menu
| Date - 2006 | Job | Hours |
Click for pictures |
| 12th February | Used a Dremel to polish the outside of the cam bearings to remove the last traces of oil varnish. Took care not to reduce the diameter of the locating surfaces. | 0.5 |
|
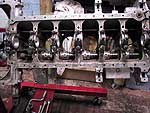
| 13th February | Refitted #7 camshaft bearing to the rear of the crankcase. Refitted the blanking bolt and end-cap to the rear of the oil gallery. Cleaned the interior and upper face of the crankcase. Fabricated a new gasket to fit between the crankcase and block using 0.030" gasket paper instead of the original 0.006" material, which always leaks because it is too thin. | 6.0 |
|
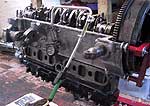
| 14th February | Finished dressing the block gasket. Tightened the head studs. Refitted the camshaft and dowels. Overhauled the tappets. | 4.5 |
|
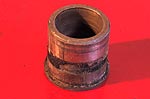
| 15th February | Removed, cleaned and replaced the bush that supports the water pump shaft. Replaced the cam wheel. | 2 |
|
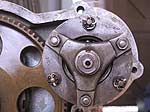
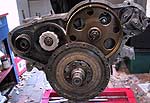
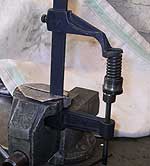
| 20th February | Assembled and started to adjust the flywheel damper poundage. | 5 |
|
| 25th February | Finally succeeded in setting the flywheel poundage. | 2 |
|
| 26th February | Dismantled the flywheel damper and installed the springs. | 1 |
|
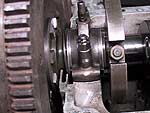
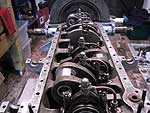
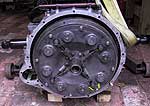
| 27th February | Installed the crankshaft. | 4 |
|
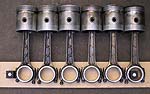
| 4th March | Fitted the pistons to the conrods. | 2 |
|
| 5th March | Torqued down the main bearing caps. Replaced the main bearing oil-supply pipes. Fitted tappets into the block | 2 |
|
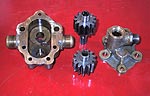
| 7th March | Refitted the spindle castings for the idler gear and dynamo drive. Assembled the dynamo drive. | 1.5 |
|
| 9th March | Installed the cylinder block. Measured, adjusted and fitted the drive shaft for the distributor / oil pump. | 3 |
|
| 11th March | Installed the water pump drive assembly and the idler gear. | 2 |
|
| 17th March | Installed the pistons. | 4.5 |
|
| 18th March | Refitted the cylinder head. | 2.5 |
|
| 27th March | Pressure tested the crankshaft. | 2.5 |
|
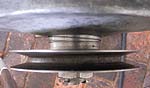
| 28th March | Cleaned the rocker assembly. Installed the crankshaft damper and timed the camshaft. | 3 |
|
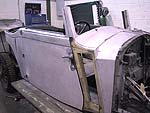
| March progress | A digression into body building | - |
|
| 10th April | Fitted the water pump drive spindle. Cleaned and fitted the sump and timing cover. | 6.5 |
|
| 13th April | Overhauled and fitted the oil pump. Replaced the dynamo pinion brakes. | 3.5 |
|
14th April |
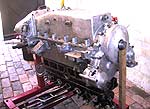
Attached crank pulley and prepared engine parts for painting. | 4 |
|
| 15th April | Stripped the paint and rust from the horn. | 1 |
|
| 15th April | Finished painting engine parts, assembled the engine sub-frame and remade shims | 5 |
|
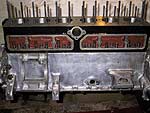
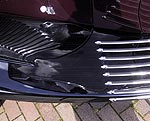
| 16th April | Fitted tappet chest covers. Stripped and resprayed the front water jacket plate yet again. Cleaned the fasteners for the jacket plates. Fitted engine sub frame. | 7 |
|
| 17th April | Resprayed jacket plate for the 4th time. Fitted the rear water jacket plate and oil supply pipes. | 2 |
|
| 23rd April | Fitted the front water jacket plate and water pump | 1.5 |
|
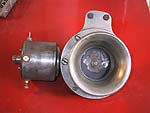
| 2nd May | Cleaned the starter motor clutch mechanism. | 1 |
|
| 3rd May | Assembled started motor clutch. Cleaned and fitted the distributor and dynamo. | 4 |
|
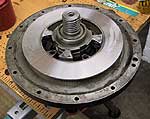
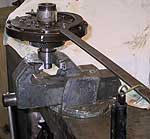
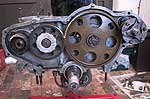
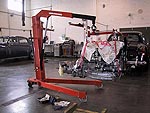
| 4th May | Removed the engine from the stand. Started to replace the clutch springs. | 2 |
|
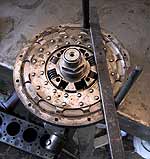
| 5th may | Finished overhauling the clutch. Fitted the clutch and both manifolds. | 5 |
|
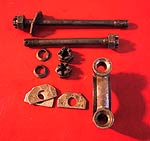
| 7th May | Stripped the paint from the HT lead tube and all engine control rods. Made new bush for the throttle rod bracket. Repainted all items. | 8 |
|
| 10th May | Fitted all engine control rods and adjusted out all lost motion. Fitted carburettor and magneto. Re-assembled the HT leads in carrier tube. Set coil and magneto ignition timing. Removed and dismantled the clutch release bearing. | 6 |
|
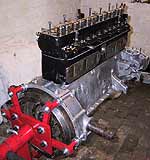
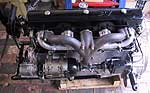
| 2007 | Engine and gearbox refitted into the chassis | - |
|
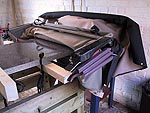
| Hood frame stripped | - |
|
|
| Car returned from the paint shop and rebuilding commences | - |
|
|
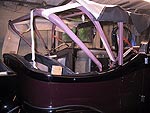
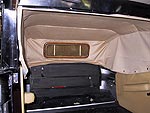
| Making and fitting a new headlining | - |
|
|
| Fitting new tread strips to the running boards | - |
|
|
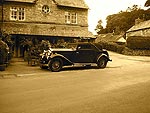
| The finished article! | - |
|
|
| Total hours to date | 211.0 |