 The
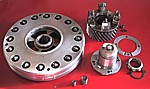
Forgotten Engine - click the icon to find out more !
The
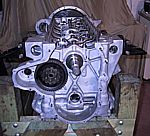
Forgotten Engine - click the icon to find out more !
The
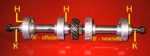
Forgotten Engine - click the icon to find out more !
The diary is set out in tabular format with each day's work briefly described. If you place the cursor over the thumbnail pictures in the right hand column a message will appear stating how many pictures are available and at what size - eg "2 x images - 34&58kb". If you choose to click to the new page a narrative alongside the pictures will explain points of interest, particular problems or methods of rectification.
Click "Back to the diary" to return to this page
Click "Next page" to advance without returning to the menu
or Return to the strip down diary
or Return to the preparation diary
Click on the thumbnail images for full pictures
| Date | Job | Hours | Click for pictures |
| 26th September | Just a note to say that I have not forgotten to update the diary. For the last three weeks I have been twiddling my thumbs waiting for the crankshaft machining to be finished. Target date for the return of the block is now week two of October. | - | |
| 12th October | Well... it's not here yet! Possibly week commencing 20th October. The crankshaft has been balanced and all parts are ready for re-assembly into a 'short' engine; so here's hoping. Watch this space - if you have nothing better to do. | - | |
| 4th November | It is now one year and five days since I started this project. Who would have thought that it would not be over by now? Certainly not me! The current hold-up is the cretin who promised to complete the hard-chroming on the big end blocks over a month ago but who continues to make excuses. My patience is wearing extremely thin... | - | |
| 3rd December | Goodness me! Another month has passed without the appearance of the block. The good news is that I received a call this morning to say that the big end blocks have been completed and that my short engine will be ready by the end of the week. The bad news is that I am away on business until the end of next week and the earliest date on which I can collect the engine is - you've guessed - Friday 13th December! Maybe it will be lucky for me? | - | |
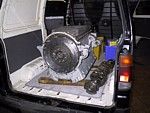
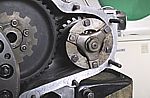
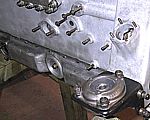
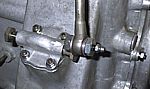
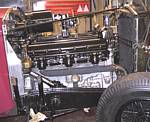
| Behind the scenes | Photographs of the 'bottom end' engineering work. | - |
 |
| Friday 13th December | Just my luck! I set out to collect the engine and within 10 miles of home my van 'failed to proceed'! It transpired that the fuel pump was playing up. The local dealer could not supply a replacement from stock so I took a flier and went anyway. There and back without further trouble - the engine is back and all is ready for re-assembly. | - |
 |
| 14th December | Cleared the decks and unloaded the van. The short block is in the workshop and is ready for work to commence. Watch this space! | - |
 |
| 17th December | Spent a few hours checking over the engine and planning the order of assembly. | 2 |
 |
| 18th December | Sorted through all of the boxes of cleaned parts to refresh my memory with the whereabouts of each batch of components. Re-assembled the crankshaft damper. | 2 |
 |
| 19th December | One of the 'A' side engine mounting studs was missing - or at least part of it was. The end of the stud was sheared off in the root of the hole. Drilled out stud and re-threaded with a helical insert. Attached both front engine mounting feet. | 3 | |
| 20th December | Christmas interruptions arriving thick and fast now... Fitted the main bearing oil supply pipe. Temporarily fitted the sump and then turned the engine the right way up in the engine stand. | 3.5 |
 |
| 23rd December | Removed the 'A' side cross-shaft spacer, removed the old bushes, cleaned and inserted new bushes. Polished the cross-shaft to relieve the new bushes. Inspected all front-end oil passages to ensure no dirt or swarf present | 6 |
 |
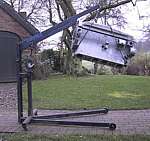
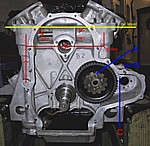
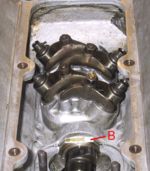
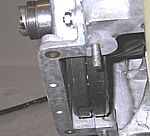
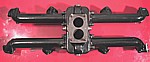
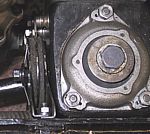
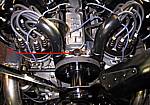
| For the curious... | For those who have always wondered (and for those who have never even contemplated) this page shows the oil supply route to the timing case and distributor drives. | - |
 |
| 27th December | Cleaned out the housing for the oil pump drive shaft. Robbed 6 studs from the old block to replace items missing from Y18D. | 1 | |
| 28th December | Cleaned out the residue of dirt that was hidden under the upper lips of the cam chest. | 3 | |
| 30th December | Installed the camshaft and bushes; test-fitted the cam follower blocks. | 2.5 |
 |
| 31st December | Seated and attached the cam follower blocks. Cleaned out the mounting holes for the head studs and checked all depths - only one problem found. Fitted 31 of the 32 'B' block head studs. | 2 |
 |
| 1st January 2003 | HAPPY NEW YEAR! Who would have thought
that I would be working on this project - especially on New Years' day - so
long after starting the job? 'B' block #4 stud hole drilled out and repaired with a helical insert - not quite straight forward as the thread is rebated. Fitted the last head stud to 'B' block and all studs to 'A' block. Fitted rocker pedestal studs to 'A' head. Went off on a wild goose chase for 3/4 hour. Fitted clutch plate and cover and temporarily installed the cam wheel. |
4.5 |
|
| 4th January | Adjusted the clutch operating levers. Cleaned out some threaded inserts and attached the upper clutch casing in readiness to time the camshaft. | 2.5 |
 |
| 6th January | Fitted rocker pedestal studs to 'B' head and made a new sump gasket. Started a final check of the block for any residual dirt, swarf, etc.. | 2.5 | |
| 7th January | Cleaned out odd pockets of dirt from the bottom lip on the block casting. Cleaned up the stud threads in the bottom of the block in readiness for attaching the sump. | 1.5 | |
| 8th January | Fitted the heads - several times. | 5 |
 |
| 10th January | Installed the distributor drive cross-shaft, timed the camshaft and fitted the crankshaft damper and gear. | 4.5 |
 |
| 11th January | Fitted the dynamo drive. Sundry cleaning and parts preparation. Removed 'A' rocker shaft and re-checked all head nuts. | 5.5 |
 |
| 14th January | Made a timing cover gasket. Fitted the timing cover and sump. Installed the cross-shaft gears and end plugs. | 5.5 |
 |
| 15th January | Started to measure the water pump components. Attached the new impellor to the new shaft. | 0.5 | |
| 16th January | Fabricated an end-stop for the water pump shaft and a spacer for the impellor. Test assembled the pump, adjusted and then fully assembled it. | 2.5 |
 |
| 17th January | Removed the holding pins from the tappets. Filled the camshaft sump with oil and installed the cam chest covers. Installed the oil pump. | 4.5 |
 |
| 18th January | Straightened some of the rocker pedestal studs and fitted the rocker assemblies. Set the tappets to a preliminary wide gap. Test assembled the front engine mountings. Adjusted one mounting to the correct fit. Fitted the front engine mountings. | 4.5 |
 |
| 20th January | Attached clutch covers, sump drain and breather. Found solidified dirt in upper block oil supply drillings and spent 2 hours carefully cleaning. Fitted both rocker oil supply pipes. | 5.5 |
 |
| 21st January | Adjusted the 4 main HT lead conduit brackets to fit neatly onto engine and then attached the pipes. Temporarily installed the distributors and 4 front conduits. Checked HT lead paths and measurements. Revised the table of HT leads lengths. Made-up 'AE' lead set. | 5 | HT lead table |
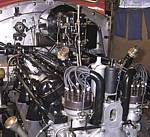
| 22nd January | Made-up HT lead sets for 'BE', 'AI' & 'BI'. Removed distributors and front conduits. Threaded the 4 HT leads sets into the main conduits along with the LT leads in the inlet piping. Fitted petrol supply pipe, petrol drain pipe, rocker oil supply pipe and manifold water supply pipe into the engine 'V'. Clamped down the pipe work with the fuel filter. Assembled the inlet manifold pipes onto the carburettor plinth and painted the bolt heads. Cleaned and painted the control rod support tube on the timing cover. | 7 |
 |
| 23rd January | Installed the petrol stand pipe for the carburettor feed. Lifted the assembled inlet manifold into place on the engine and checked the alignment. Attached the petrol overflow pipes and the water supply pipe to the carburettor plinth. | 2 | |
| 24th January | Fitted the inlet manifold gaskets (dry). Lined up manifold and gaskets with the heads and inserted the bolts. Made gaskets for the oil pressure relief valve and installed the valve. Installed the water pump. Had to modify the bracket that secures the manifold water-supply pipe to the block before connecting the pipe to the pump. Installed the distributor adjusting shaft to the support tube on the timing cover - had to fabricate shim to remove end play. | 7 |
 |
| 25th January | Painted the bolts attaching the inlet manifolds to the heads. Made and inserted 12 studs for mounting the exhaust manifolds. | 2.5 | |
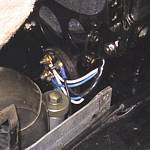
| 27th January | Modified the main oil filter with a top 'O' ring seal and the spring beneath the bottom filter support plate. Replaced the filter lid retaining nuts with the correct 1BA items. Made an adaptor and primed the rocker assembly with oil. Painted and attached the throttle control arm to the rear of the block. | 6 |
 |
| 28th January | For today and the following 3 days I engaged
the help of a friend of mine, JB, to help with the engine installation and
sundry adjustments. Moved the engine, tools, ancillaries and spares
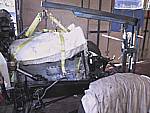
from the workshop into the garage. Installed the engine in the
chassis, lined-up, bolted down, shimmed the rear mounting and attached the
prop shaft. THEN I FOUND THE MISTAKE! |
14 |
 |
| 29th January | (With JB) Removed the engine, corrected the error and re-installed. Installed the oil pump drive shaft and both distributors. Changed the springs in the points. Fitted the exhaust manifolds. We both spent two hours straightening and adjusting the engine friction dampers. | 16.5 |
 |
| 30th January | (With JB) Straightened and re-fitted the oil pressure gauge pipe. Fitted the dynamo and couplings. Attached the HT lead conduits, threaded the HT leads and connected them to the distributor caps. Filled the sump with oil. | 15 | |
| 31stJanuary | (With JB) Installed the main exhaust system and then the down pipes; modified the latter to fit properly. Soldered the LT end-connectors and then attached same. Fitted the carburettor, air filter and supports - adjusted to correct fit. Installed the fuel lines. Fitted all remaining engine control rods and linkages. Fitted the pedal shaft support bracket to the engine. | 15 |
 |
| 1st February | Connected the clutch pedal actuating arm and
adjusted the free play. Installed the 12 exhaust spark plugs and
leads. Adjusted the ignition timing. Temporarily installed the
radiator and hoses. Primed the carburettor and checked for fuel leaks.
Filled the radiator with a weak solution of antifreeze and hot water -
checked for leaks. Pressed the starter button and THE ENGINE STARTED FIRST TIME! |
5.5 |
 |
| 3rd February | Adjusted the clutch pedal to obtain a clear release on the clutch. Repaired one leaking petrol pipe union and replaced the sealing washer on the engine petrol filter. Stopped the leak of oil from the rocker supply pipe. ran engine up to temperature without closing the radiator filler to ensure no head gasket leaks. Drained and removed radiator then installed the steam valve. | 6.5 | |
| 4th February | Re-fitted the rear floor boards. Made and fitted new drain pipe for the radiator drain tap. Made a new bracket to hold two new modern coils. Removed rocker shafts and tightened the head bolts. Checked all engine bolts for tightness. | 6.5 | |
| 5th February | JB was enlisted to help again. Fitted the fan and starter-handle bracket. Replaced the rocker shafts and adjusted the tappets. Mounted the shock absorber stand pipes. Fitted both front wings and connected to the running boards and the rear flitch bolts to the chassis. | 14 |
 |
| 6th February | (With JB) Installed the radiator, connected the wiring junction boxes, bolted up the front wing stays and flanges. Fitted the bonnet. | 14 |
 |
| 7th February | Installed the valence in front of the radiator. Attached and wired the headlamps, horns and spotlight. | 5 | |
| 10th February | Filled the front shock absorbers - 4 pint (Imp.) each of SAE20 oil. Touched-in the odd paint chips on the manifolds, etc.. | 1.5 | |
| 11th February | Road tested the car to check for any defects. Adjusted the clutch pedal to give proper disengagement. Re-checked the timing. Altered the headlamp settings. Final check through prior to MOT test. | 4 | |
| 13th February | Drove to garage for the Ministry of Transport Test (annual UK road-worthiness test). PASSED! | - | |
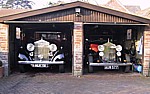
| 15th February | A few friends joined me in a celebration of 'driving out of the garage'. | - |
 |
| Time taken so far on this section | 221 | ||
| Time taken so far... | 712 |
| Return to home page |
